A basic square crosscut is a useful first exercise before compound angles or crown molding. Sliding and non-sliding saws require different motions. Learn your saw’s procedure rather than copying the movement of a different model in a video.
Mount the saw securely, support a sound board against the fence, align with power isolated and complete one controlled crosscut.
Go straight to the stepsBefore you begin
Follow the model’s hand-clearance zone and cutting sequence. Do not cut tiny unsupported scraps, stack pieces, cross your arms in the blade path or use a miter saw for ripping. Get practical instruction before first use if needed.
What you’ll need
- Miter saw, suitable blade and manual
- Secure bench or compatible stand
- Stock supports and approved clamp
- Scrap board within cutting capacity
- Eye and hearing protection and dust control
Let’s do this
Step by step
- 01
Mount and inspect with power isolated
Fasten the saw to a suitable bench or stand and inspect the guard, blade and fence. Check that the selected blade is allowed for the saw and material. Lock miter and bevel at the intended square-cut settings.
- 02
Support the stock
Place one straight, sound board flat on the table and against the fence. Support long ends level with the saw table without tipping the saw. Use the approved clamp and keep the cutoff free to release without trapping it against a stop.
- 03
Align on the waste side
Mark the cut with a square. With power isolated, lower the stationary blade to check its relationship to the line without touching teeth. Leave the kerf on the waste side. Check blade and clamp clearance through the intended motion.
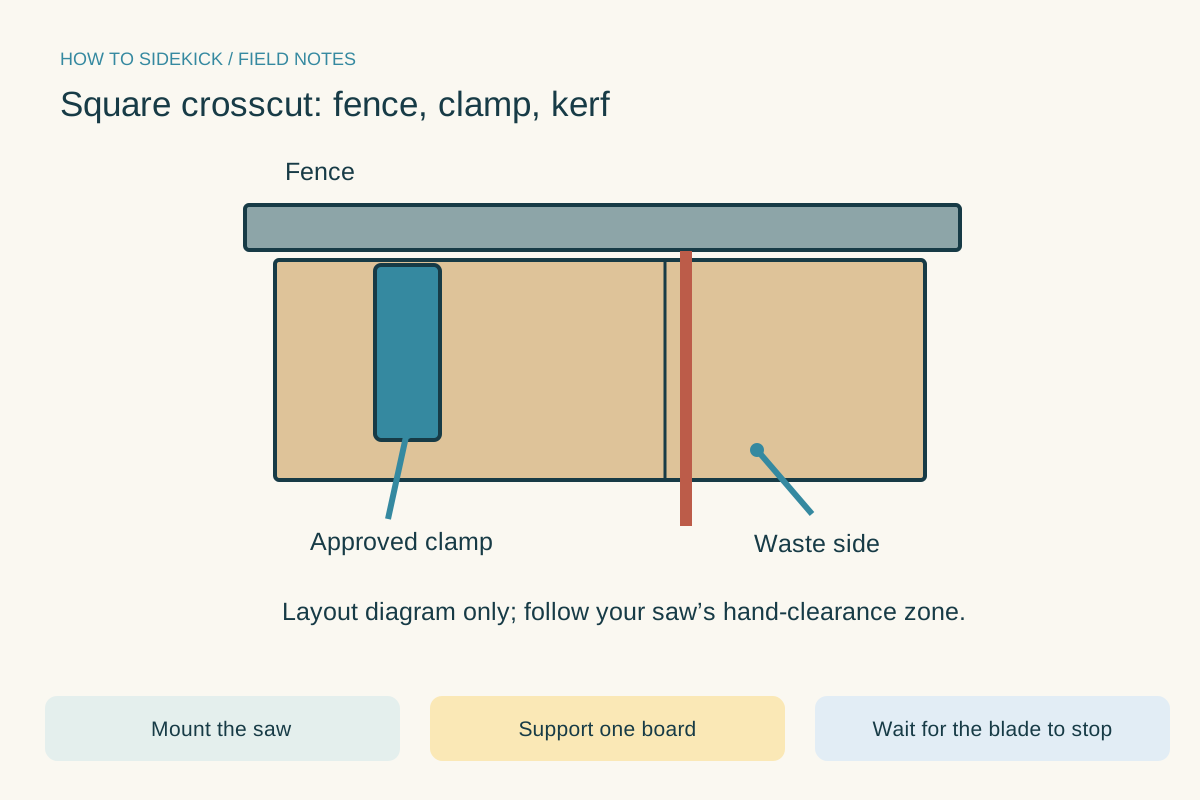
Square crosscut: fence, clamp, kerf. Use the instructions below for the full procedure.Open full-size image - 04
Cut using the model’s sequence
Clear the area, restore power and use the prescribed grip and hand-clearance zone. Allow full blade speed before cutting. Lower steadily without forcing. For a sliding saw, follow its specific slide sequence; do not improvise a pull cut.
- 05
Wait before lifting or clearing
Release the trigger and keep the head controlled until the blade stops completely before raising it as directed. Remove stock and offcuts only when safe. Disconnect power before changing angles, blades or clearing anything near the blade.
Measure the result, not just the scale
Use a square on a test cut. If it is not square, check the saw’s calibration procedure with power isolated. Do not compensate by twisting the work during a cut. Good support and a verified setup save more time than rushing the first finished piece.
A quick final check
- Saw securely mounted
- Stock supported and clamped
- Kerf aligned on waste side
- Blade stops before head rises
Common questions & sticking points
Can I cut a very short piece by holding it tightly?
Use only stock sizes and securing methods permitted by the manual. Hands must stay outside the exclusion zone; a tight grip does not make a tiny offcut safe.
Does a miter saw make every type of cut?
No. It is for supported crosscuts and permitted angle cuts. Ripping, freehand cuts and unsupported irregular stock require another appropriate method.
Sources & further reading Optional
References used to check this guide. Follow your product’s own safety instructions where its design differs.
- CCOHS: miter-saw precautions
- Lowe’s: miter-saw setup and cutting
- DEWALT: DWS780 operating instructions