Annual topping-up can quietly create a very deep mulch layer. Check what is already there before ordering another load. The goal is a useful surface covering, not a mound around each tree or enough material to bury low-growing plants.
Remove weeds, measure existing mulch and add only enough to reach a suitable total depth. Leave space around stems and trunks.
Go straight to the stepsBefore you begin
Keep mulch off trunks, crowns, vents and siding. Check the plants’ needs and local building or fire guidance before choosing material near a structure.
What you’ll need
- Appropriate mulch
- Rake and hand tool
- Gloves
- Tape measure
- Wheelbarrow or manageable bags
Let’s do this
Step by step
- 01
Measure the bed and existing layer
Sketch the area, measure its approximate square footage and check the current mulch depth in several places. Count only the additional depth needed. For trees, favor a broad ring rather than a narrow, tall pile against the trunk.
- 02
Choose material for the planting
Select an organic mulch suited to the bed, such as shredded bark around established landscape plants. Fresh arborist chips can suit trees and shrubs as a surface layer; do not assume they are the right material to mix into vegetable soil.
- 03
Clear weeds and check moisture
Remove weeds and accumulated debris without injuring shallow roots. Check the soil beneath, not just the old mulch. Water appropriately if the planting needs it before covering the surface; mulch does not compensate for already dry roots.
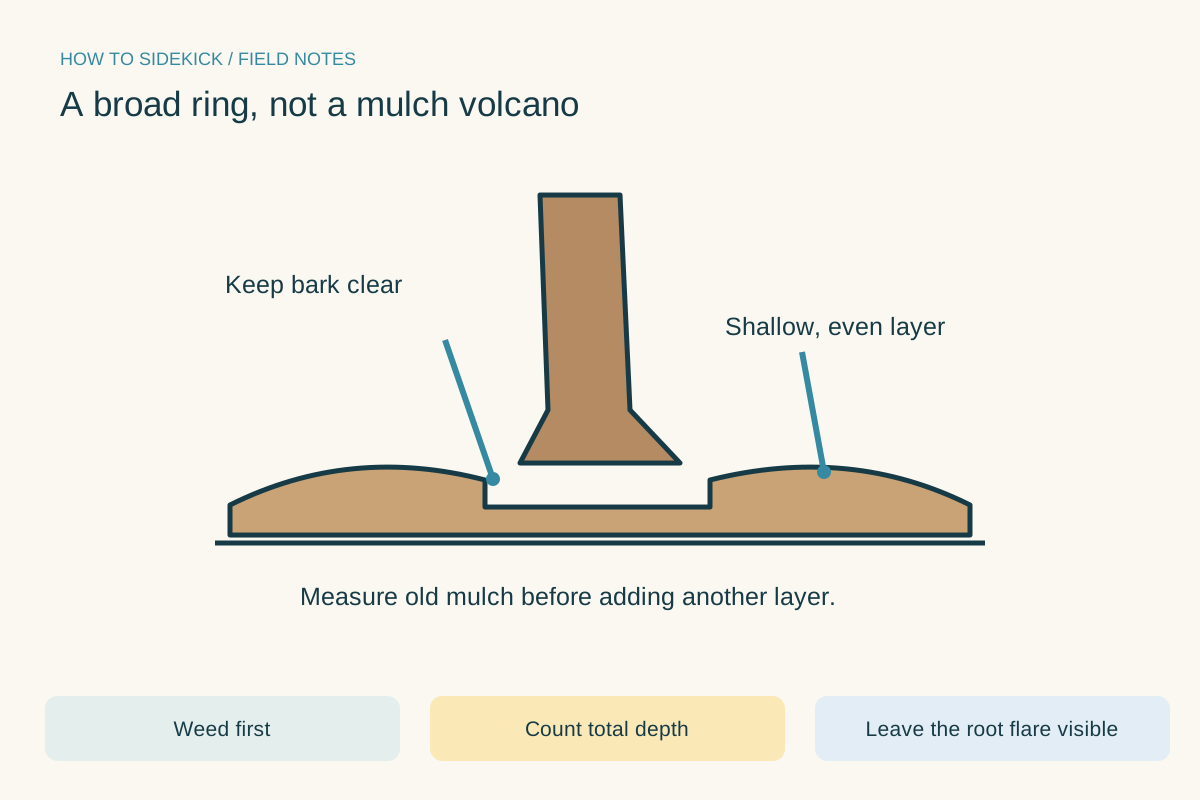
A broad ring, not a mulch volcano. Use the instructions below for the full procedure.Open full-size image - 04
Spread a shallow, even layer
For tree and shrub beds, Maryland Extension recommends a total layer around one to three inches, adjusted to the material and conditions. Rake it evenly and keep it back from trunks and plant bases. Leave the root flare visible rather than building a volcano shape.
- 05
Inspect after settling
Look for buried stems, displaced emitters or low plants covered by mulch. Recheck depth after rain and correct piles. Continue monitoring soil moisture; the surface appearance alone does not tell you whether roots need water.
A quick mulch calculation
Cubic feet = bed area in square feet × added depth in inches ÷ 12. For example, adding two inches over 60 square feet takes about 10 cubic feet, or five two-cubic-foot bags before allowing for irregular edges. If one inch is already present and your target is two, calculate one additional inch, not two.
A quick final check
- Existing depth measured
- Weeds removed
- Trunks and crowns clear
- Total depth checked
Common questions & sticking points
Should mulch touch the tree trunk?
No. Leave a clear gap and keep the root flare exposed. A mound against bark can create moisture and other problems.
Do I need to remove all the old mulch?
Not routinely if it is sound and appropriate. Break up problematic mats and account for its depth before adding more; remove material that is unsuitable or excessive.
Sources & further reading Optional
References used to check this guide. Follow your product’s own safety instructions where its design differs.
Last source check: September 24, 2026