Good hanging makes finishing easier. Lay out the wall before cutting so board ends have support and seams do not collect in awkward places. A generic screw-spacing rule cannot replace the panel maker’s instructions or a rated wall-system design.
Plan seams on framing, cut each panel to fit, support it securely and use the fastening schedule for the board and wall assembly.
Go straight to the stepsBefore you begin
This guide covers wall panels on exposed framing. Required fire, sound, moisture and structural assemblies dictate board type and fastening. Complete required inspections first; protect wiring and plumbing and do not cover unresolved dampness.
What you’ll need
- Correct drywall panels and compatible screws
- Helper or suitable panel-handling equipment
- Tape measure and drywall square
- Utility knife and drywall saw
- Screw gun or driver with depth control
- Eye and dust protection
Let’s do this
Step by step
- 01
Check framing and panel requirements
Confirm the framing is sound, aligned and dry, with backing where panel edges need it. Identify services and protective plates. Choose the specified board thickness, size and fasteners for wood or metal framing rather than buying screws by appearance.
- 02
Plan panel positions
Sketch the wall, studs and openings. Arrange sheets to reduce joints and stagger seams between rows as the installation guide requires. Avoid joints terminating at opening corners when the system instructions direct otherwise. Mark framing locations so you can find them through the board.
- 03
Measure and cut
Measure each location. On a supported panel, score the face along a straightedge, snap the board and cut its back paper. Trim rough edges carefully. Measure openings before cutting and keep powered cutout tools away from concealed services.
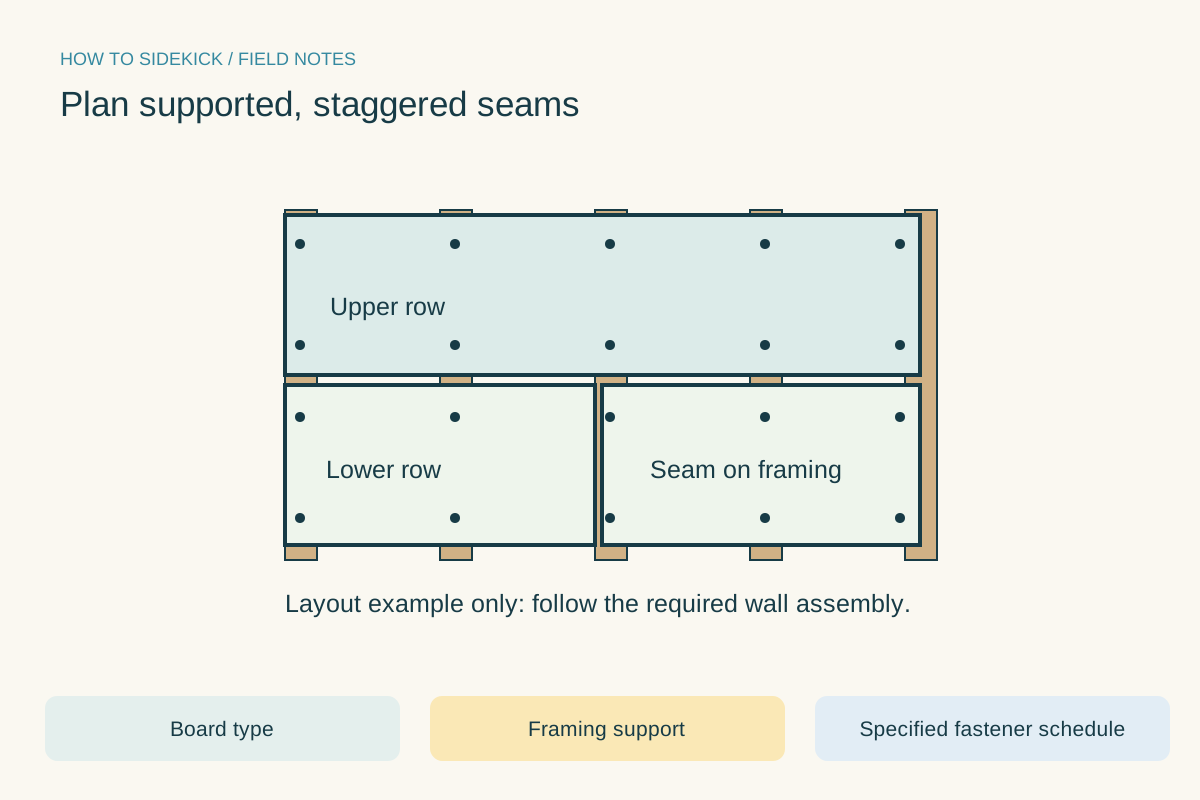
Plan supported, staggered seams. Use the instructions below for the full procedure.Open full-size image - 04
Lift and position with help
Support the sheet while aligning it. Follow the system’s ceiling and floor clearances; do not force an oversized board into place. Keep the sheet stable while fastening, and use suitable handling equipment rather than trying to balance a full panel alone.
- 05
Fasten without breaking the face
Drive the specified screws into framing at the required spacing and edge distances. Set heads slightly below the face without tearing the paper. Correct a torn fastener location according to the installation guidance; burying the screw deeper does not restore its hold.
- 06
Inspect before finishing
Check unsupported edges, protruding heads, damaged paper and gaps. Resolve them before taping. Photograph the completed wall and keep the panel and fastening information, especially where a particular assembly was required.
Hanging is not finishing
Joint treatment, drying, sanding and priming come afterward. Budget separate time for those stages. A sheet that looks flat in room light may show poor fastening or uneven framing when you inspect across it with a work light.
A quick final check
- Board and assembly matched
- Services protected
- Edges supported
- Screws dimple without torn paper
Common questions & sticking points
Should sheets run horizontally or vertically?
Use the orientation required or allowed by the board and wall assembly. Framing layout, sheet length and finishing access also affect the decision.
Can ordinary drywall be used inside a shower?
Do not assume it can. Use the backing and waterproofing system specified for the wet area and local requirements.
Sources & further reading Optional
References used to check this guide. Follow your product’s own safety instructions where its design differs.
- Lowe’s: hanging drywall
- Lowe’s: drywall material selection
- Georgia-Pacific: Wallworks installation and finishing guide