A good installation starts behind the frame. Identify the hanger and the wall before choosing hardware. This walkthrough covers a framed picture; a large mirror, TV, or cabinet needs its own mounting system.
Check the frame’s weight, choose fixings for the wall, locate a stud or suitable anchor position, measure the hanger drop, install the hardware, and level the picture.
Go straight to the stepsBefore you begin
Check for concealed cables and pipes before penetrating a wall. A stud-finder reading does not prove the area is clear. If the wall construction or a reading is uncertain, stop and get help identifying it.
What you’ll need
- Frame with sound hanging hardware and a known weight
- Compatible rated fixings and their instructions
- Tape measure, pencil, level, and paper for a template
- Stud finder suitable for the wall
- Correct drill bit and hand tools, if required; eye protection
Tools & supplies for this project
Affiliate disclosure: We may earn a commission when you buy through these Lowe’s links. How our links work.
Use what you already own. If you need supplies, compare these options with the requirements above and choose only the items your project needs.
Check Lowe’s for current price, availability and specifications.
Let’s do this
Step by step
- 01
Identify what must carry the frame
Inspect its back: D-rings, wire, sawtooth bar, and cleats need compatible supports. Check that the attachments are secure. Weigh the complete frame, including glass, and read the mounting instructions. Do not add wire to a frame intended for direct D-ring mounting.
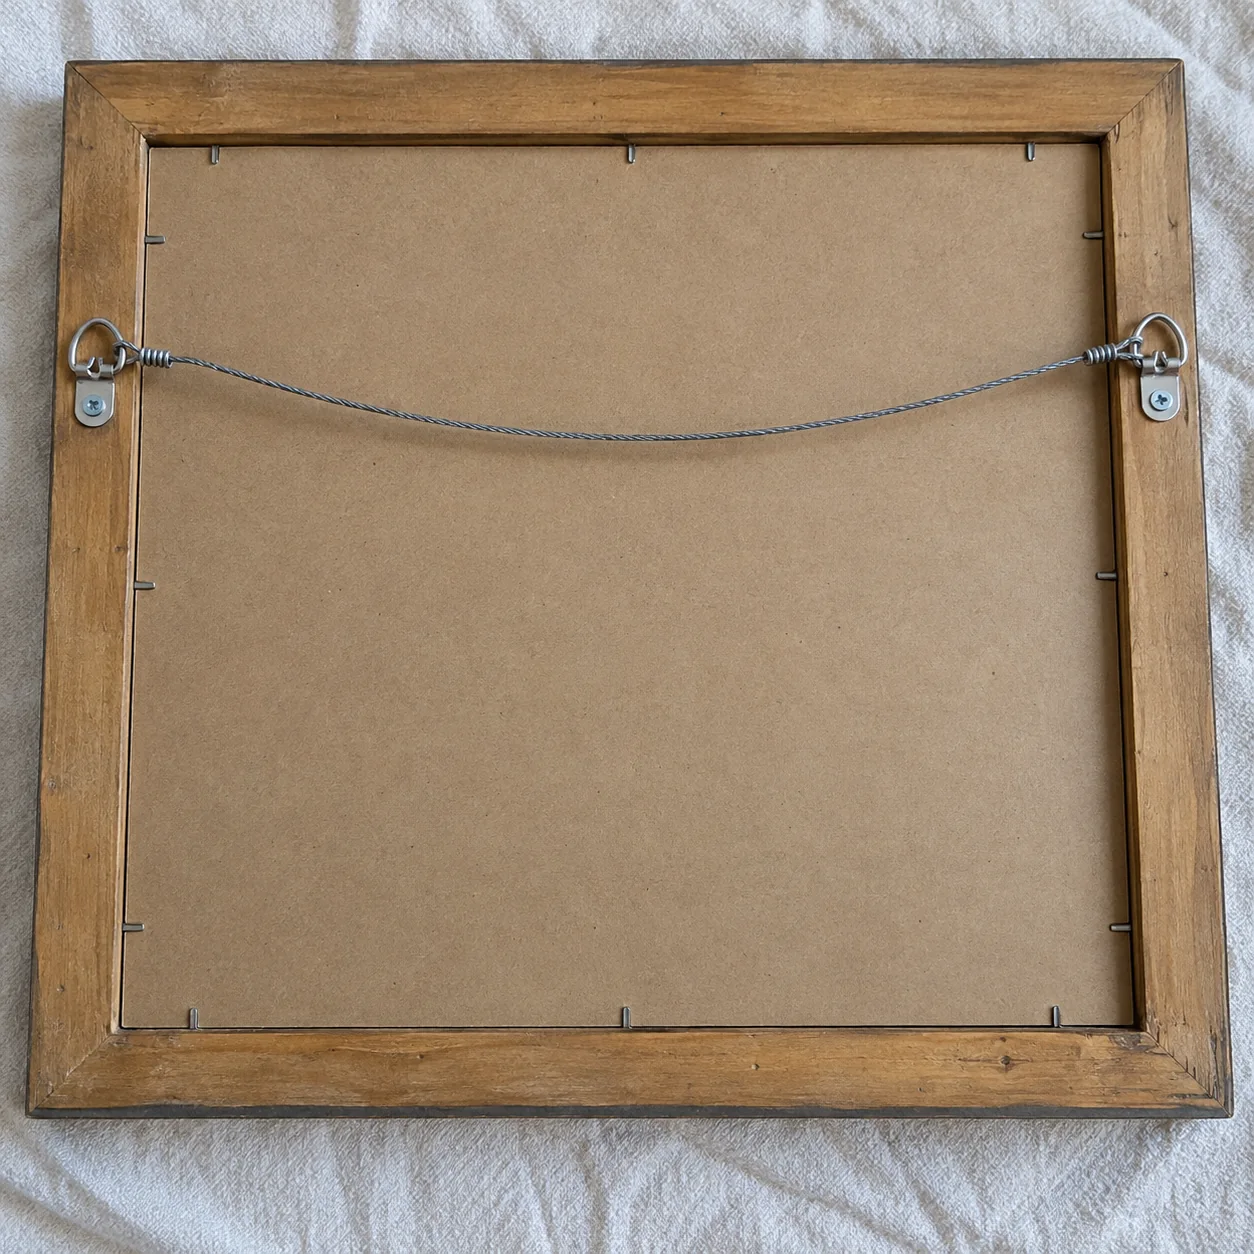
One wire-equipped frame example. Use the hanging method the frame maker specifies; not every D-ring frame should have wire added.Open full-size image - 02
Try the position with paper
Make a full-size paper outline and put it on the wall with tape suitable for the finish. Look from the doorway and your usual seat. Once the position works, mark the frame’s intended top and center. Remove the paper before scanning.
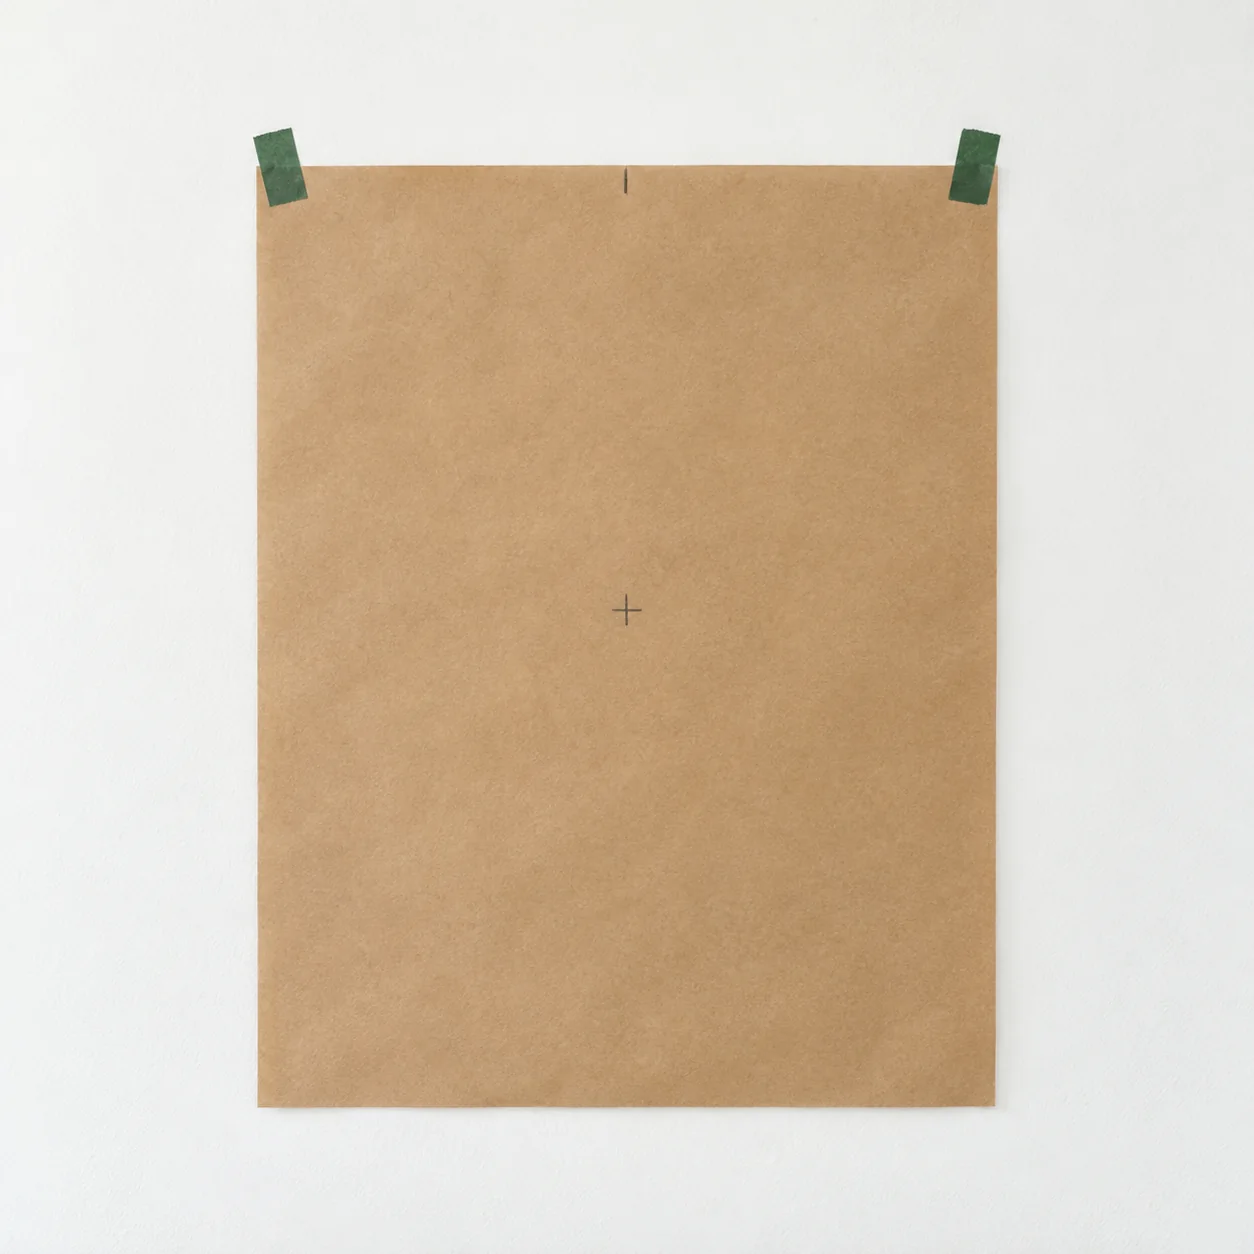
Try a paper outline first. Mark the top and center, then remove the paper before scanning the wall.Open full-size image - 03
Find a stud where it would support the hanger
Calibrate your detector as its manual directs. For an edge-finding model, keep it flat and scan slowly from opposite directions; mark both indicated edges and their midpoint. Repeat nearby to check consistency. Center-finding models work differently. An unexpectedly broad or inconsistent reading needs investigation, not a guessed drill hole.
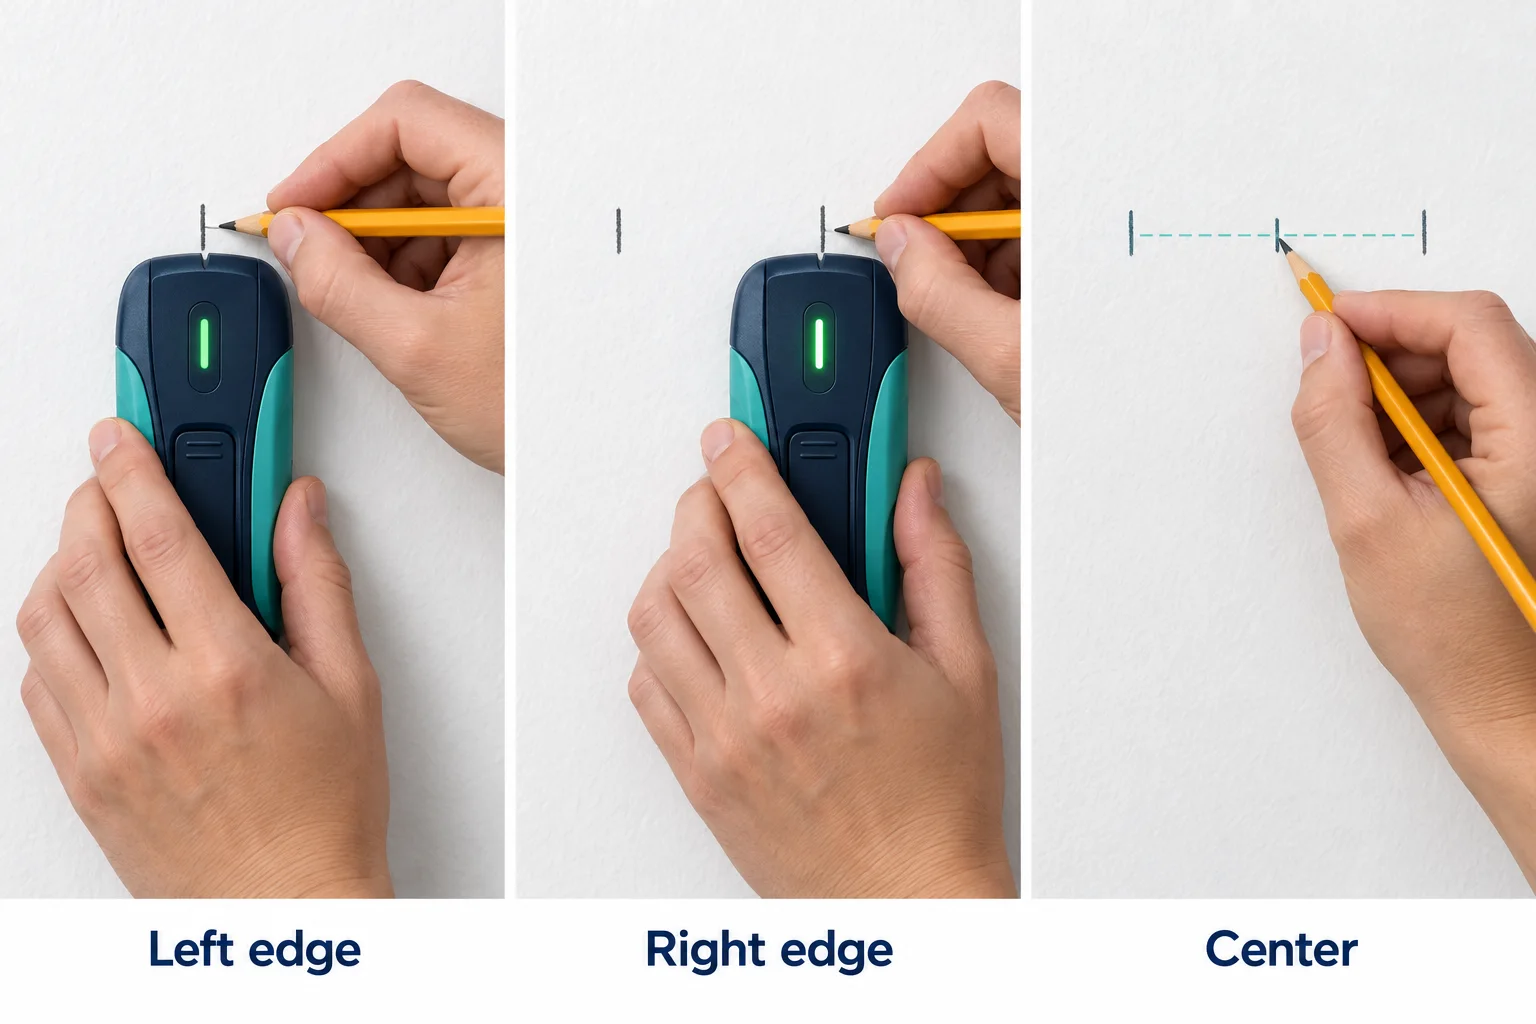
For an edge-finding model, mark both edges and find their midpoint. Follow your detector’s calibration instructions.Open full-size image - 04
Choose a fixing for that exact wall
Into a wood stud, use a compatible hanger and the specified screw. In hollow drywall, select an anchor with an appropriate working-load rating, wall-thickness range, and cavity clearance. A channel toggle bears on the rear of the drywall. Metal studs, plaster, and masonry need hardware specifically approved for those materials.
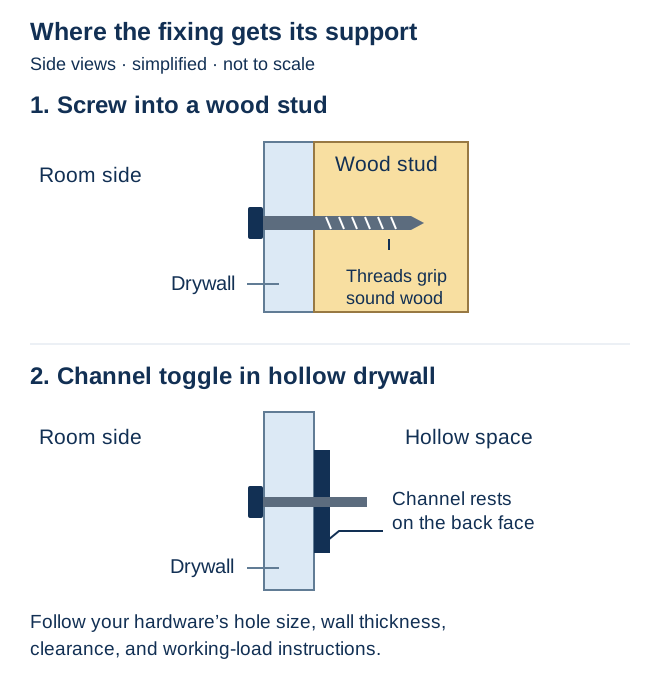
Side-view principles, not installation dimensions. The toggle bears against the back of the same sheet you drill through.Open full-size image - 05
Transfer the hanger position, then mark the fastener
Measure down from the frame top to the point where its hanger rests on the support. For wire, hold it at the intended support points while measuring. Transfer that drop below your top mark. If using a hook, align its supporting seat there and mark its screw or nail hole separately.
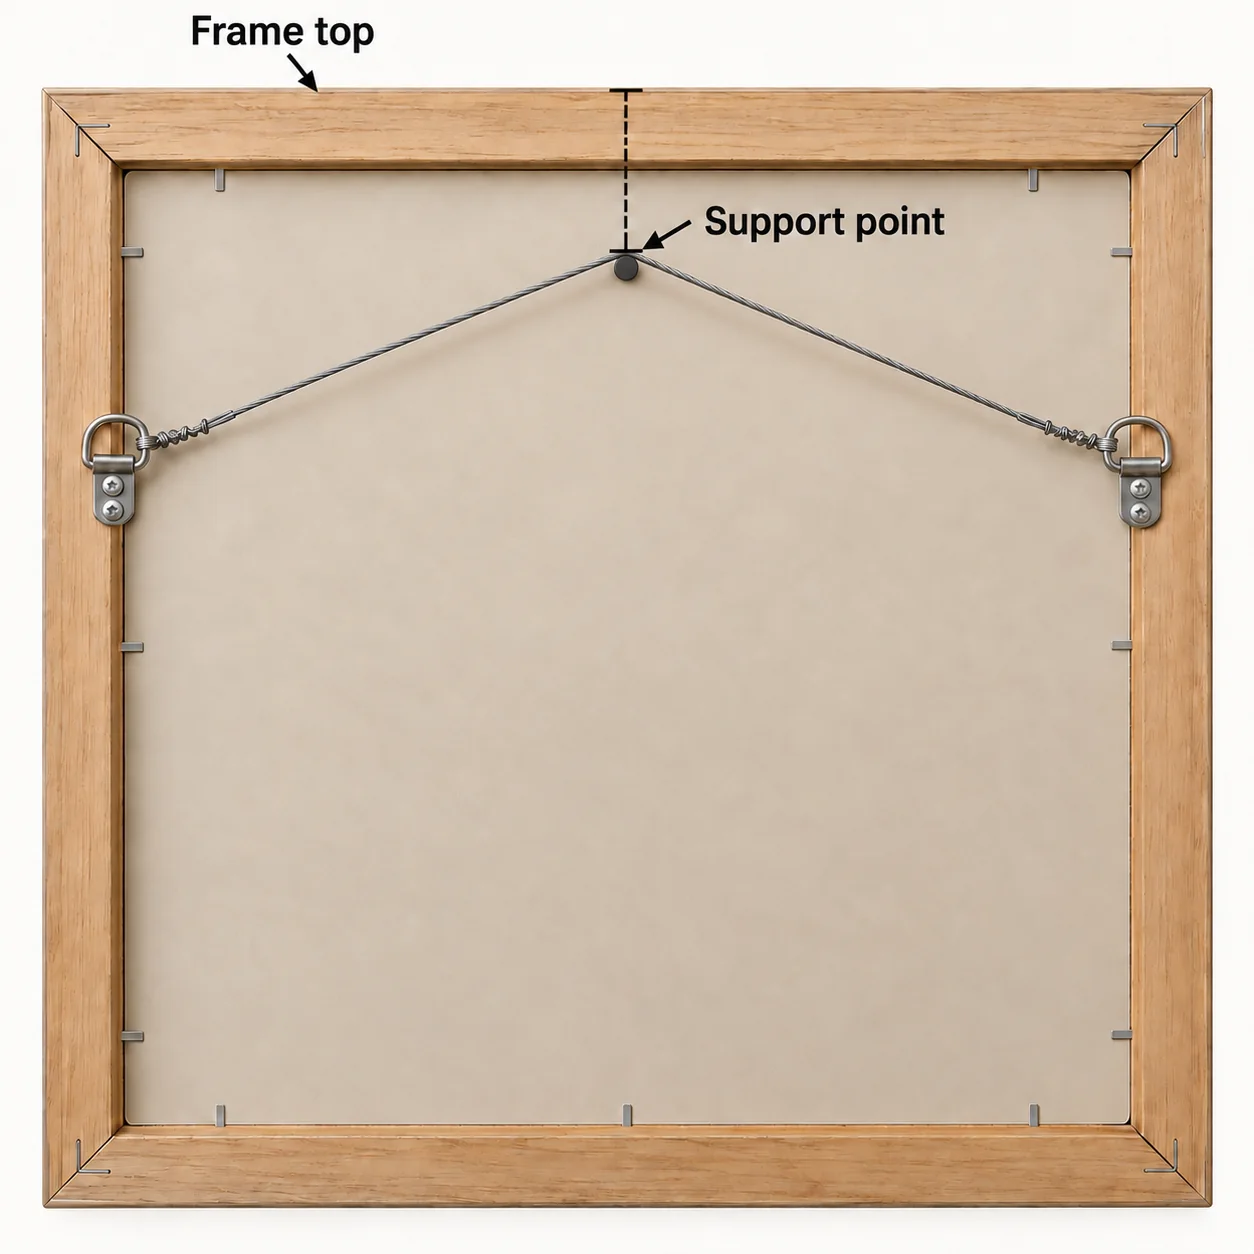
Measure to the supported wire, not the slack wire. A hook’s fastener hole may sit above its supporting seat.Open full-size image - 06
Install to the hardware instructions
Recheck the marked area. Use the specified pilot hole or anchor hole, screw, and installation sequence. Do not substitute a larger hole or keep tightening into crumbling drywall. Stop if a fixing spins, the surface breaks, or the fastener cannot seat correctly; repair or relocate before hanging.
- 07
Engage the hanger and level the frame
Lift the picture onto every intended support, with a helper for an awkward frame. Confirm the hanger has actually caught before letting go. Check the top with a level and adjust using the hardware’s method. Take it down if anything shifts or loosens.
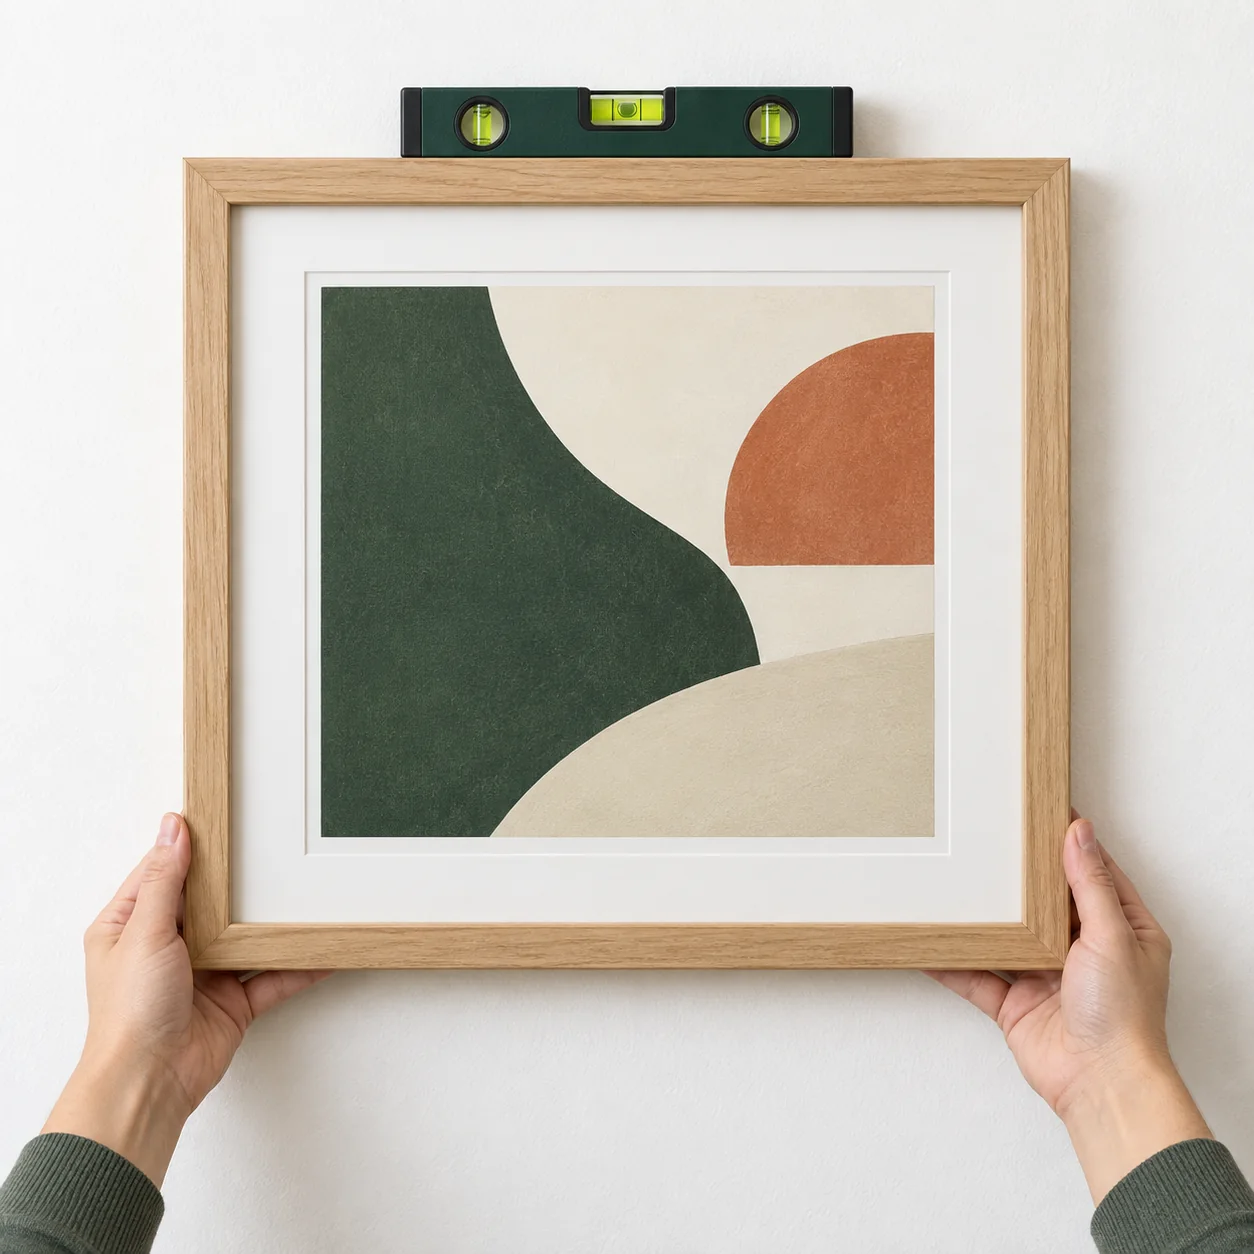
Keep the frame supported until every hanger has caught. Use the level to check its final position.Open full-size image
Optional supplies on Amazon
Affiliate disclosure: As an Amazon Associate I earn from qualifying purchases. How our links work.
Use what you already have. These links open Amazon search results so you can compare suitable supplies; they are not individual product reviews.
Treat the hardware as a complete system
The frame attachment, hook, fastener, anchor, and wall all matter. Use the instructions for the particular combination. Two separately rated anchors do not automatically create a system with double the capacity. Heavy or irreplaceable pieces deserve a mounting plan suited to the frame and wall.
If you prefer adhesive strips
Use a product intended for picture frames, with a suitable surface and weight rating. Follow the complete application sequence. Command picture strips require a wait before loading and have restrictions including wallpaper, placement over beds, and valuable items. They are a separate method, not a substitute for a failed screw hole.
Match the support to the wall
| Situation | What to check |
|---|---|
| Wood stud | Fastener type and required penetration into sound wood. |
| Hollow drywall | Anchor working load, sheet thickness, and space to deploy behind it. |
| Plaster, masonry, or metal studs | A system approved for that specific construction. |
| Adhesive picture strips | Frame size, surface, weight limit, curing time, and removal directions. |
A quick final check
- The fixing is suitable for the wall and the complete frame’s weight.
- The area was checked before drilling or nailing.
- Every hanger is engaged, the frame is level, and nothing is loose.
Common questions & sticking points
How do I mark two D-ring hanging points accurately?
Record each ring’s position from the top and side of the frame. Transfer the horizontal spacing to tape on a level, then place it relative to your wall center mark. Set each supporting point at its measured height. Account for any distance between the hook’s seat and its mounting hole.
Why does my picture hang lower than the mark I measured?
The frame top, hanger seat, and fastener hole are different positions. You may have measured slack wire or placed the nail at the frame-top mark. Take the frame down and remeasure using the wire’s supported shape or the actual D-ring contact point before changing the wall fixing.
Sources & further reading Optional
References used to check this guide. Follow your product’s own safety instructions where its design differs.
- Lowe’s: Picture layouts, frame hardware, and placement
- Lowe’s: D-ring spacing and hook-hole measurements
- Zircon: Edge-finding stud detector and scanning limits
- Zircon: Scanning and calibration guidance
- TOGGLER: Channel-toggle installation and wall clearance
- Command: Picture-strip instructions and restrictions
- Hangman: Compatible D-ring and sawtooth hanging systems