A table lamp is a manageable place to learn this everyday task. These steps cover an intact, ordinary screw-in bulb in a portable lamp. A ceiling fixture, pin-base bulb, broken bulb, or integrated LED fitting needs its own instructions.
Unplug the lamp, let the bulb cool, unscrew it, match the replacement to the fixture, and screw the new bulb in gently before reconnecting power.
Go straight to the stepsBefore you begin
Unplug the lamp before touching the bulb or socket. Stop if the bulb is broken, the socket is loose or scorched, or the cord is damaged. Do not put fingers or tools inside a socket.
What you’ll need
- Compatible replacement screw-in bulb
- Lamp label or instructions
- A clear, stable work surface
Tools & supplies for this project
Affiliate disclosure: We may earn a commission when you buy through these Lowe’s links. How our links work.
Use what you already own. If you need supplies, compare these options with the requirements above and choose only the items your project needs.
Check Lowe’s for current price, availability and specifications.
Let’s do this
Step by step
- 01
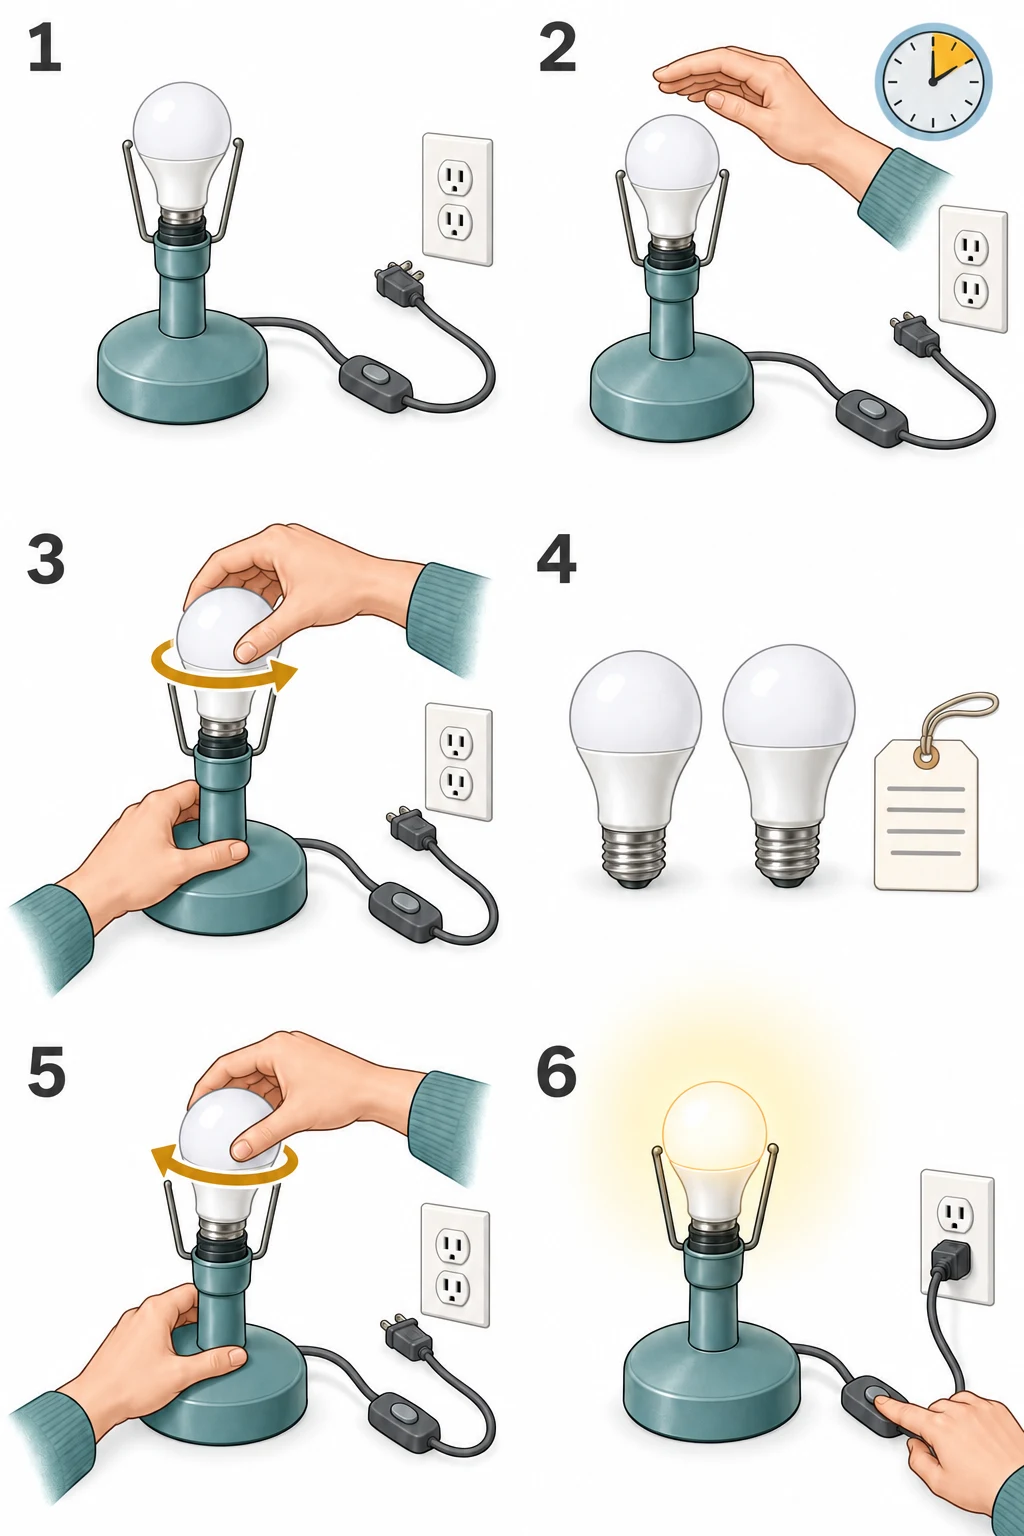
Disconnect the lamp
Switch the lamp off, then remove its plug from the outlet. Set the lamp where it cannot tip and you can reach it comfortably.
Open full-size image - 02
Let the bulb cool
Wait until the bulb can be handled comfortably. Hot incandescent and halogen bulbs can burn skin. Remove a shade only if its instructions require it.
Open full-size image - 03
Unscrew the old bulb
Steady the lamp with one hand. Turn the intact bulb counterclockwise, viewed from its outer end toward the socket. If it sticks, stop instead of forcing the glass.
Open full-size image - 04
Check the replacement
Match the base and bulb type. Stay within the fixture’s maximum actual wattage. Check enclosure and dimmer compatibility where applicable; “60-watt equivalent” describes brightness, not the bulb’s actual power draw.
Open full-size image - 05
Install without overtightening
Keep the lamp unplugged. Align the screw base and turn clockwise until snug. Cross-threading or excessive force can damage the bulb or socket.
Open full-size image - 06
Reconnect and check
Refit any removed shade. Plug the lamp in and switch it on. If it flickers, smells hot, or still fails with a suitable bulb, unplug it and have the lamp checked.
Open full-size image
Optional supplies on Amazon
Affiliate disclosure: As an Amazon Associate I earn from qualifying purchases. How our links work.
Use what you already have. These links open Amazon search results so you can compare suitable supplies; they are not individual product reviews.
Choose brightness separately from power
Use lumens to compare brightness and the package’s actual watts for the fixture limit. Write down the base and color temperature if you want neighboring lamps to match. A photo of the old bulb label helps you shop without relying on its shape alone.
When a bulb change is not the repair
A loose socket or damaged cord is a different job. Do not keep tightening the bulb to compensate. For a hardwired fitting, isolate the correct circuit and follow that fitting’s instructions rather than assuming unplugging instructions apply.
A quick final check
- The lamp was unplugged during replacement.
- The bulb matches the fixture and is snug, not forced.
- The cord and socket show no damage.
Common questions & sticking points
Do I twist every bulb?
No. Bayonet, pin-base, and integrated LED products use different fittings. Identify the base before applying force.
Can I fit a brighter LED?
Only if its actual wattage, size, temperature rating, and intended use are compatible with the fixture. Check the labels on both.
Sources & further reading Optional
References used to check this guide. Follow your product’s own safety instructions where its design differs.
- ESFI: Unplug lamps before work
- CPSC: Fixture wattage and electrical fire precautions
- Philips Hue: Screw-base bulbs and integrated-light differences
- US Department of Energy: Bulb cooling and replacement basics